Manual Testing – BDD
The BDD approach uses Gherkin syntax (Given / When / Then) to describe test scenarios as human-readable stories. It suits teams that follow behaviour-driven development or want to share scenarios between manual and automated tests.
The Classic approach stores test descriptions in freeform Markdown — better suited for teams that prefer flexible, plain-language test cases. See Manual Testing – Classic.
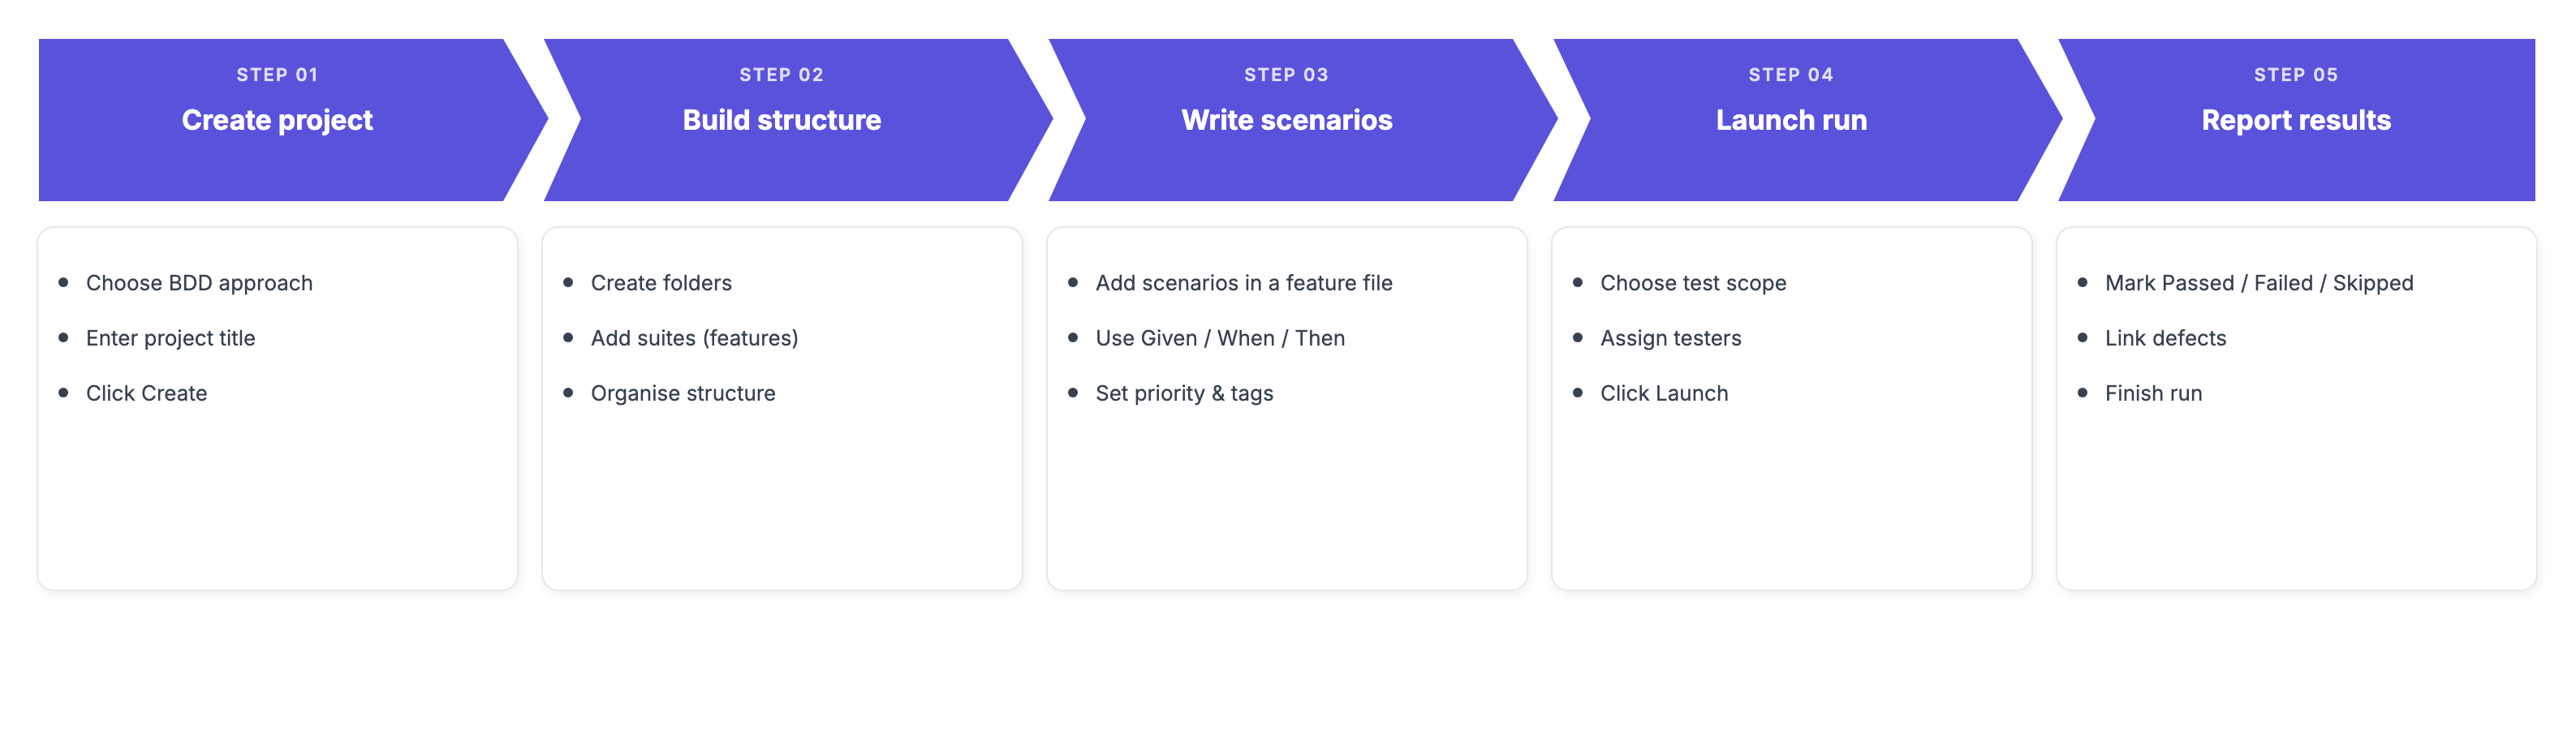
This tutorial covers the BDD approach: from creating a project to finishing a manual run.
How to Create a Project
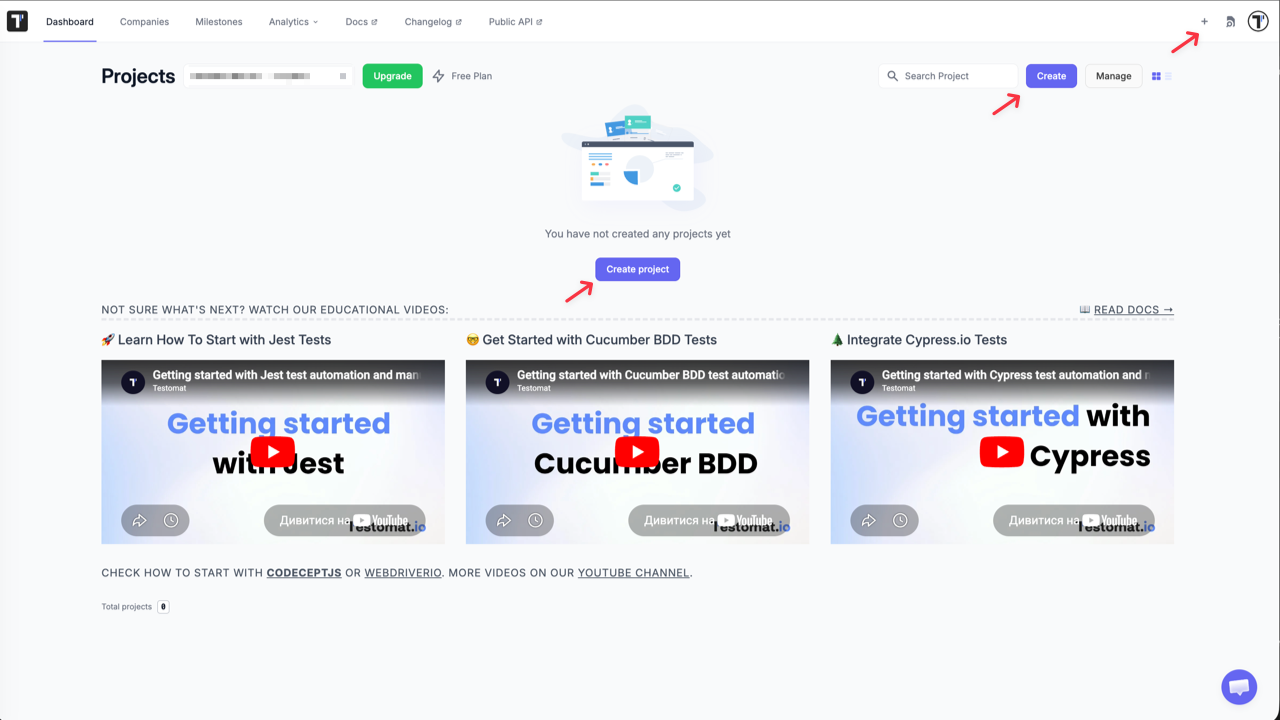
Section titled “How to Create a Project”- Open the New Project form using one of the following options:
- Click the + icon in the top-right corner
- Click the Create button on the dashboard
- Click Create project if you have no projects yet
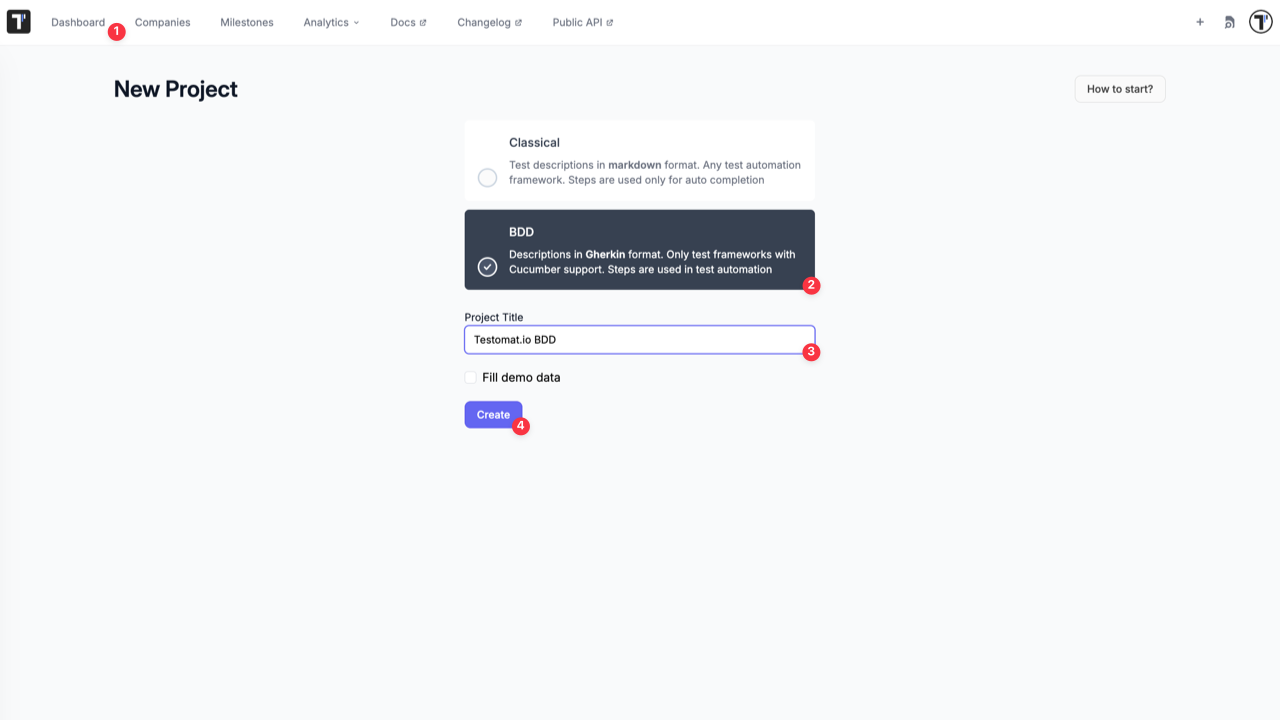
- Select BDD.
- Enter a name in the Project Title field.
(Optional) Enable Fill demo data to pre-populate the project with sample scenarios.
- Click Create.
How to Set Up Folders and Suites
Section titled “How to Set Up Folders and Suites”In the BDD approach, suites map to feature files. Each suite holds one feature and its scenarios.
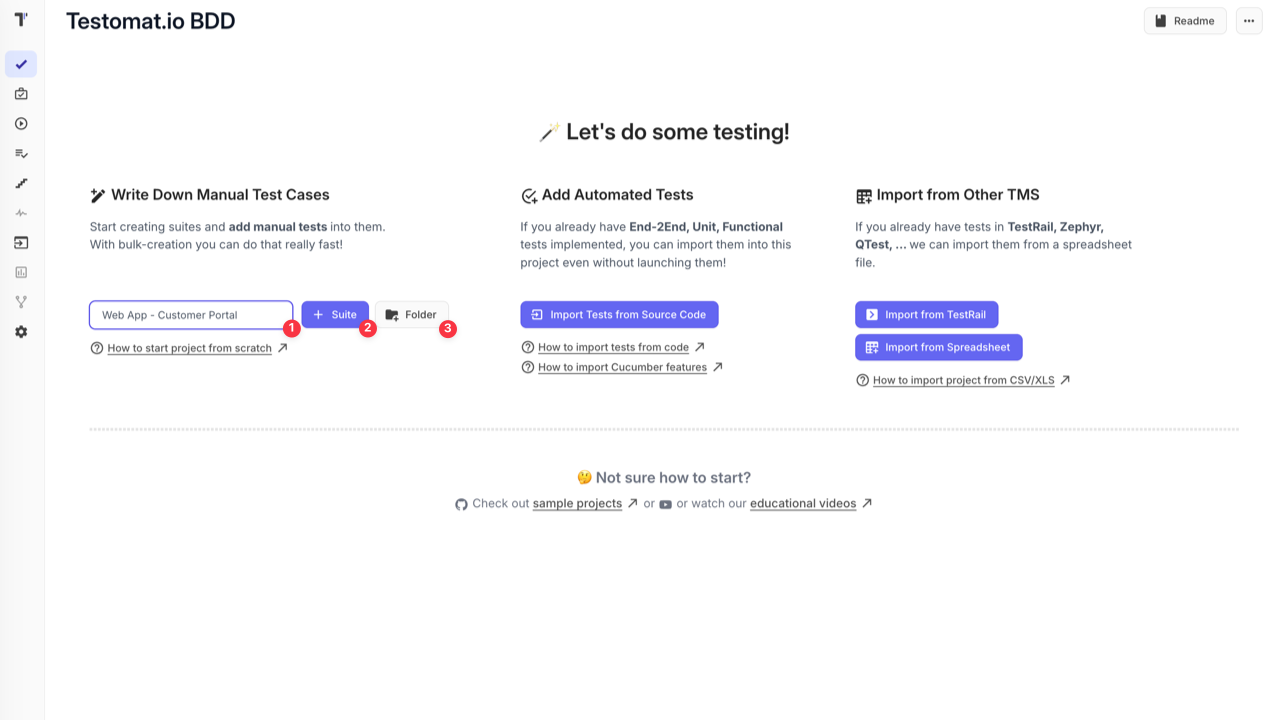
Project└── Folder └── Folder └── Suite = Feature └── Scenario = Test Case└── Suite = Feature └── Scenario = Test CaseOn the Tests page, enter a name in the input field, then click:
- + Suite — to create a suite (feature file) at the root level
- Folder — to create a folder at the root level
The folder or suite appears in the test tree. Use the New folder and New suite links to continue building your structure:
- Next to a folder or suite — to create nested items inside it
- At the root level — to add more folders or suites at the top level
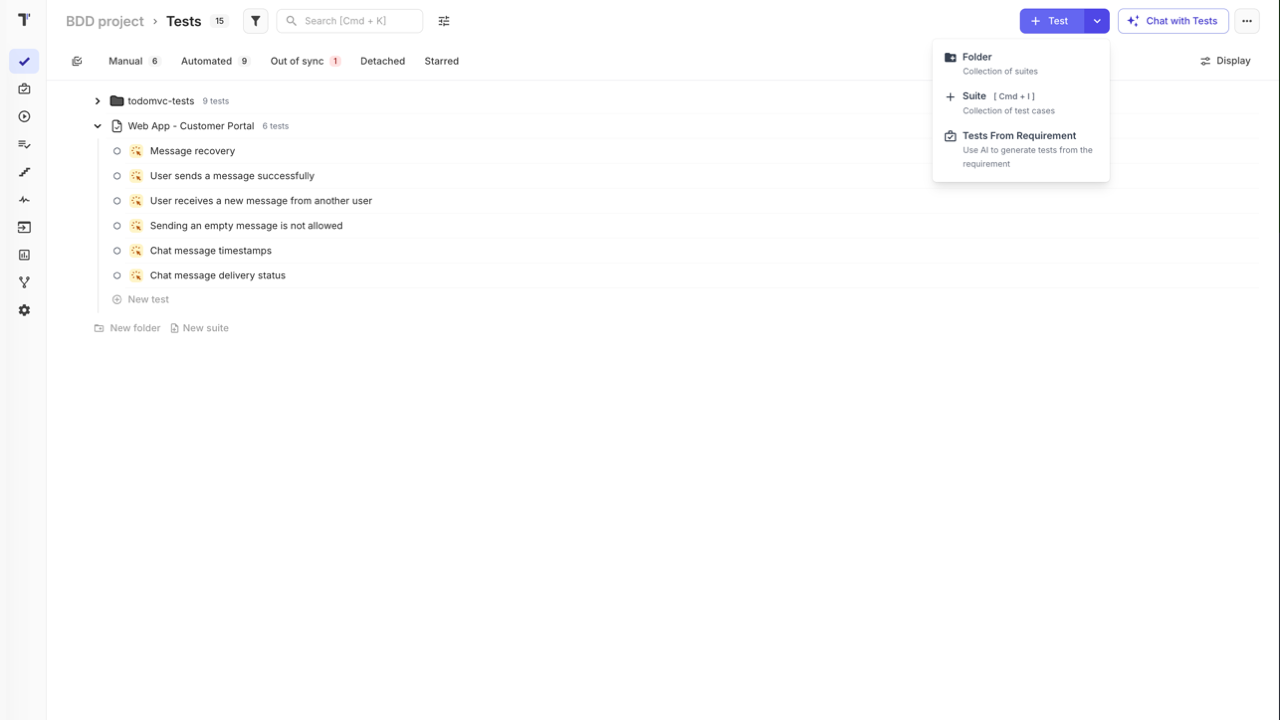
You can also click the + Test button in the top-right corner and select:
- Folder — to create a folder
- Suite — to create a suite
Once your structure is in place, open a suite to start adding scenarios.
How to Write Scenarios
Section titled “How to Write Scenarios”In the BDD approach, each suite has a Feature File editor and individual Scenario editors.
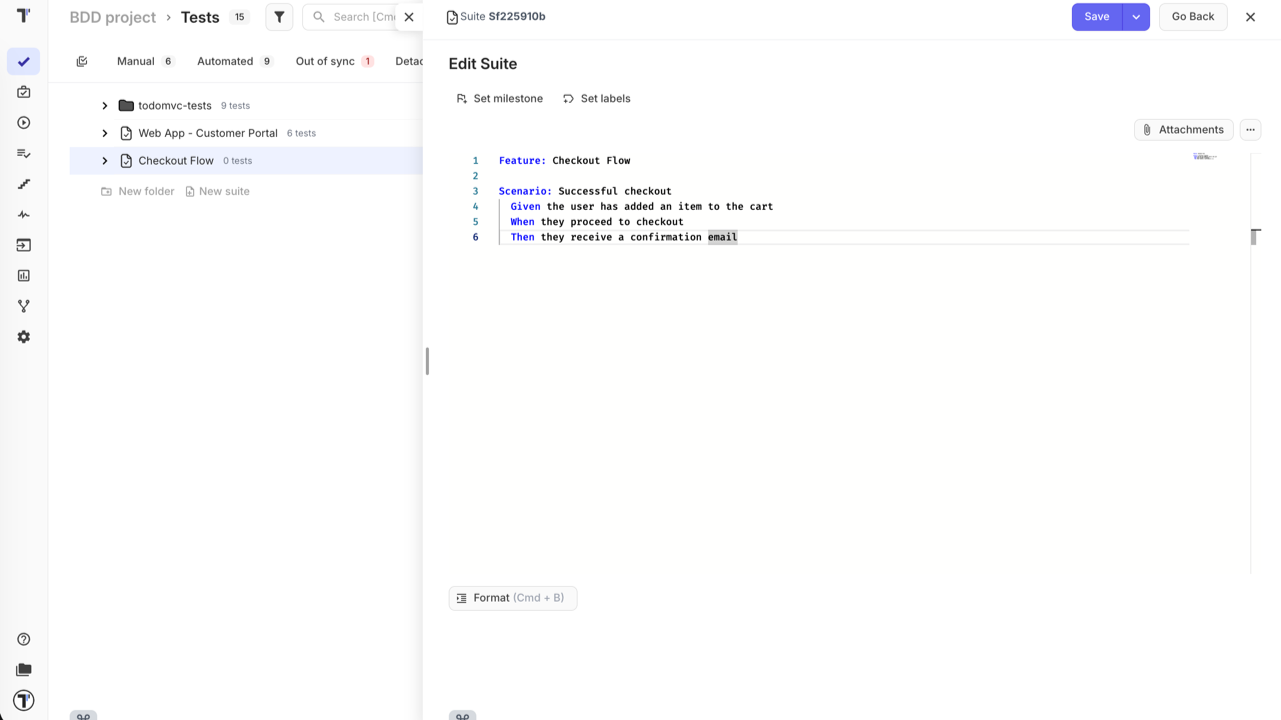
Open a suite and click Edit Feature File to write Scenario: blocks — each one automatically becomes a separate test case in the suite when saved. It also holds the Feature: declaration. Each scenario uses Gherkin keywords:
Scenario: Successful checkout Given the user has added an item to the cart When they proceed to checkout Then they receive a confirmation email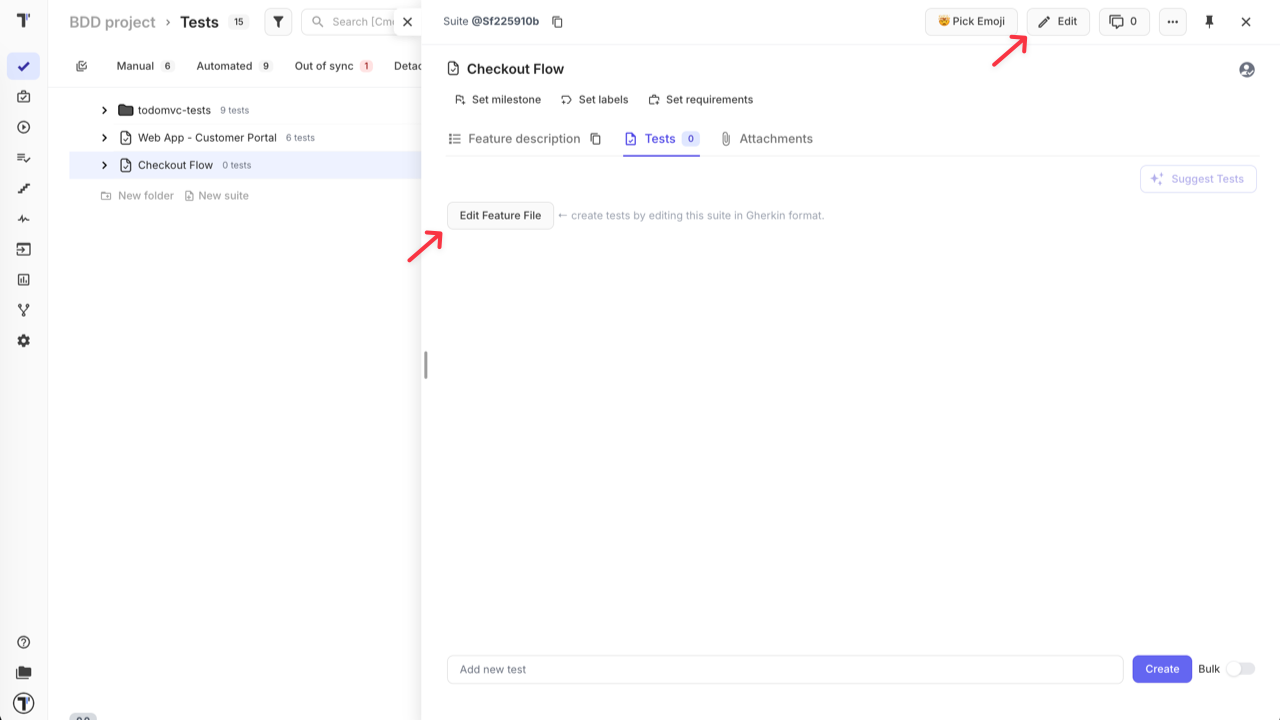
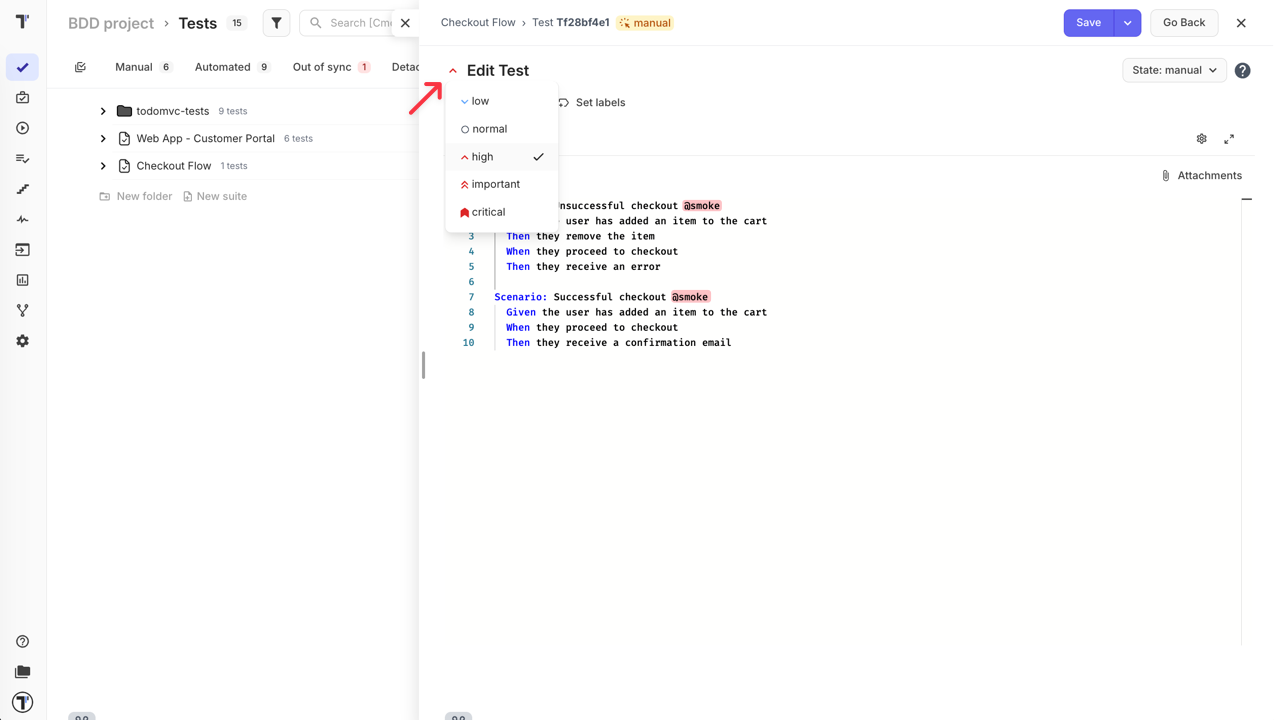
Set the scenario priority (Low, Normal, High, Important, Critical) using the dropdown in the top-left corner of the scenario editor.
Add tags directly in the scenario using @, for example @smoke or @regression. Tags let you filter scenarios in test plans and runs.
How to Use Scenario Outline
Section titled “How to Use Scenario Outline”Use Scenario Outline: when you need to run the same scenario with different data sets — for example, testing multiple user roles, input combinations, or edge cases. This avoids duplicating scenarios that differ only in values.
A basic scenario hardcodes the values:
Scenario: Login with valid credentials Given the user is on the login page When they enter username "user1" and password "pass123" Then they are redirected to the dashboardA Scenario Outline: replaces fixed values with placeholders and provides test data in an Examples: table:
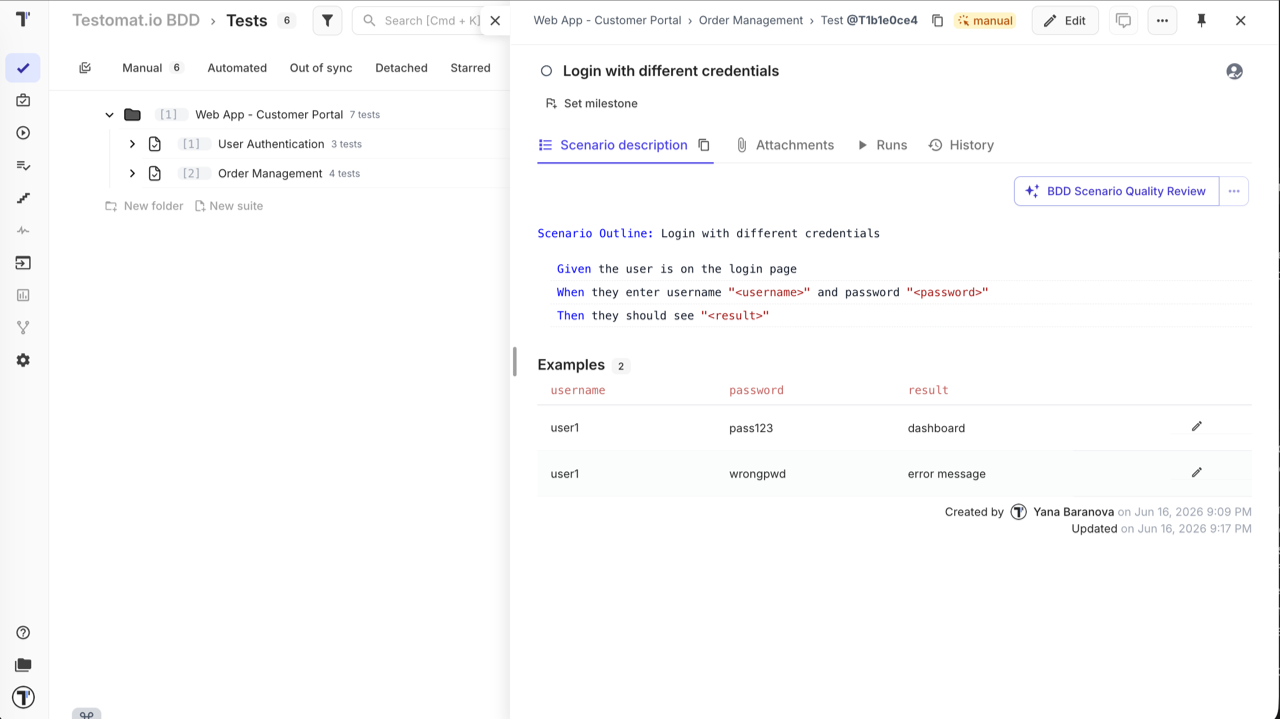
Scenario Outline: Login with different credentials  Given the user is on the login page  When they enter username "<username>" and password "<password>"  Then they should see "<result>"
  Examples:  | username | password | result        |  | user1    | pass123  | dashboard     |  | user1    | wrongpwd | error message |
Each row in the Examples: table runs as a separate test case during a manual run.
How to Organise Scenarios
Section titled “How to Organise Scenarios”There are two ways to structure your BDD tests — choose based on your team’s workflow:
-
One feature file, multiple scenarios — use Edit Feature File inside the suite and add all
Scenario:blocks under a singleFeature:. Each scenario becomes a test case on save. Best for keeping related scenarios together and editing them as a single file. -
One scenario per test case — create separate BDD test cases individually using + Test. Each test case holds one
Scenario:block. Best when you need individual tagging, descriptions, or granular control per scenario.
Writing Effective Gherkin
Section titled “Writing Effective Gherkin”Good Gherkin is readable, reusable, and resilient to UI changes. Three principles that help:
Keep steps atomic — one step, one action. Combining multiple actions into a single step makes it hard to reuse and debug.
# avoidWhen the user selects a product and adds it to the cart
# betterWhen the user selects a productAnd adds it to the cart
Write for intent, not implementation — describe what the user is trying to do, not how the UI is built. If a button moves or gets renamed, your scenario should still make sense.
# avoidWhen the user clicks the green "Place Order" button in the bottom-right corner
# betterWhen the user places the order
Always define the starting state — Given sets the exact context before the action. Never assume the system is already in the right state.
# avoidWhen the user proceeds to checkout
# betterGiven the user has items in the cartWhen the user proceeds to checkout
Putting it together — here is how the same test looks in a Classic freeform format versus a well-structured Gherkin scenario:
Classic test case:
Add item and complete purchase
- Log in to the account
- Search for a product and add it to the cart
- Enter shipping details and confirm payment
Expected result: Order confirmation page is displayed with an order number
Refactored as Gherkin:
Scenario: Successful purchase with a new shipping address Given the user is logged in And the cart contains at least one item When the user proceeds to checkout And enters a valid shipping address And confirms the payment Then the order confirmation page is displayed And the order number is visibleFor a full reference of editor features and Gherkin syntax, see BDD Test Case Editor.
How to Use Shared Steps
Section titled “How to Use Shared Steps”Every time you save a scenario or feature file, Testomat.io automatically adds its steps to the Steps Database. No manual setup needed — the database grows as you write.
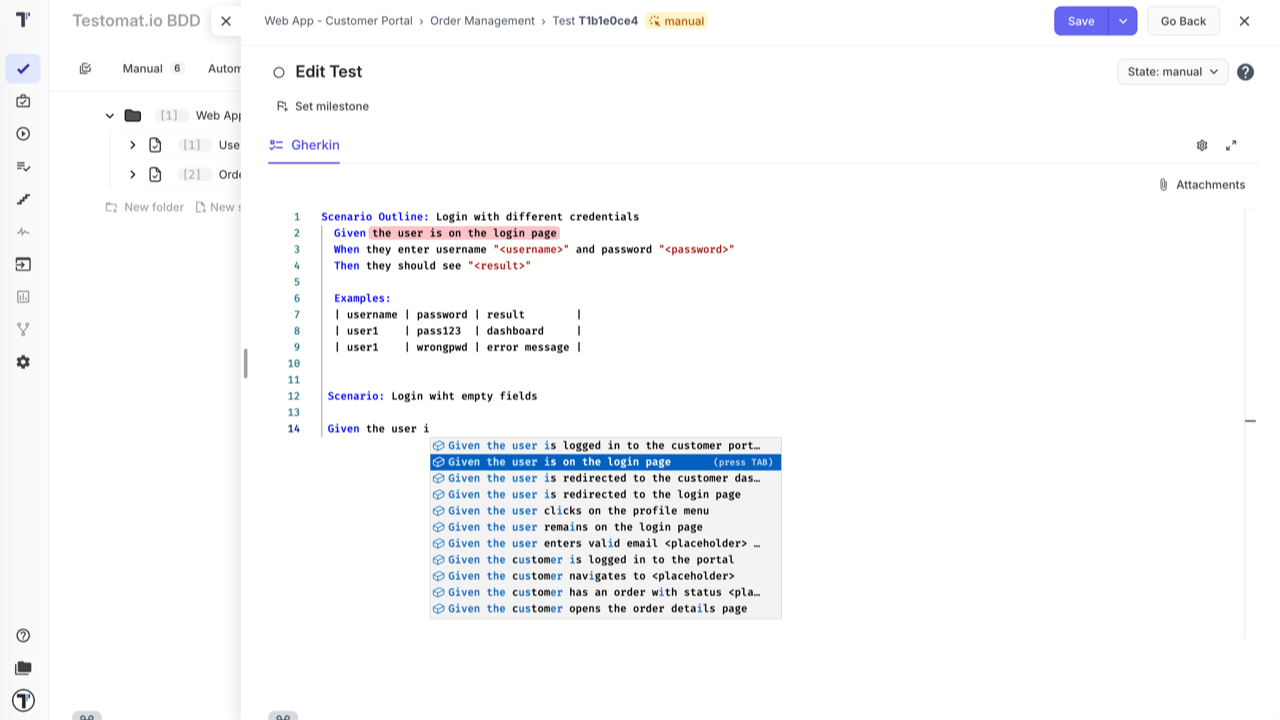
To reuse steps from the database while writing:
- Start typing a step inside the editor.
- Enable Autocomplete Steps in the editor toolbar — suggestions appear as you type.
- Select a step from the list to insert it.
For more details, see Steps & Snippets.
How to Launch a Manual Run
Section titled “How to Launch a Manual Run”Once your scenarios are ready, you can launch a manual run to start executing them.
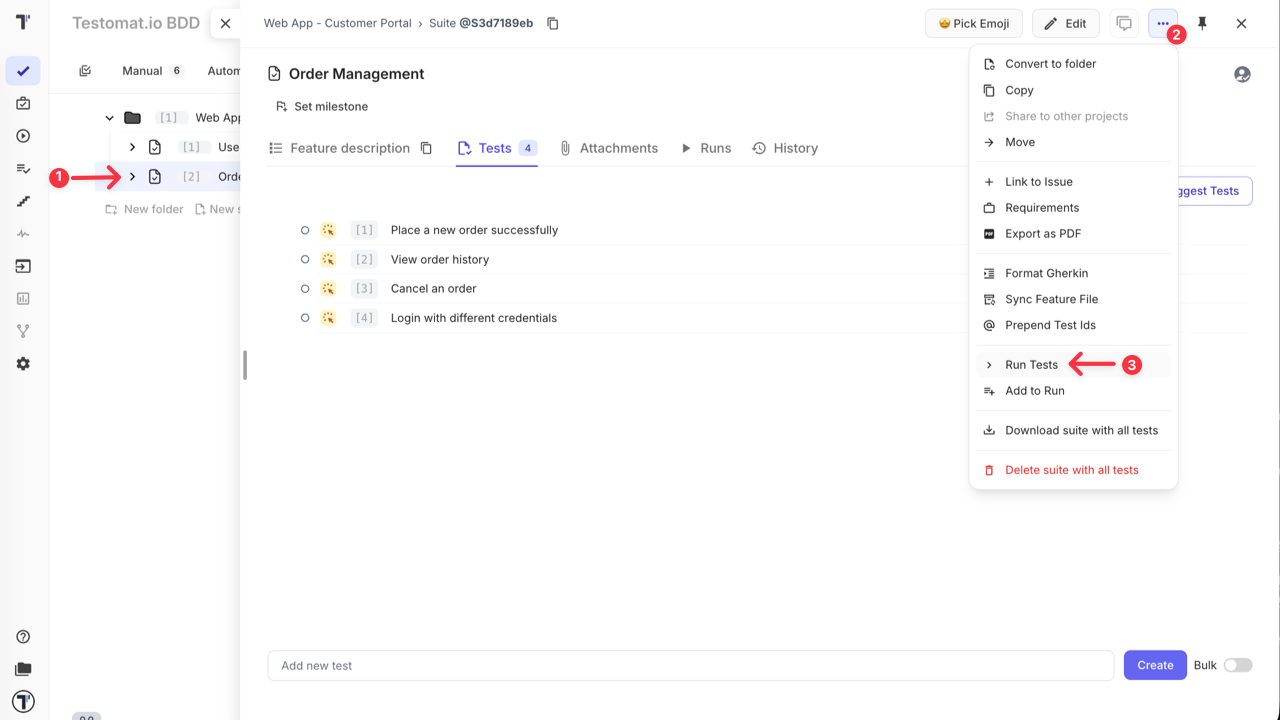
From the Tests page — the fastest way to start a run without leaving your test tree:
- Run a specific suite — click the extra menu (…) next to a suite and select Run Tests
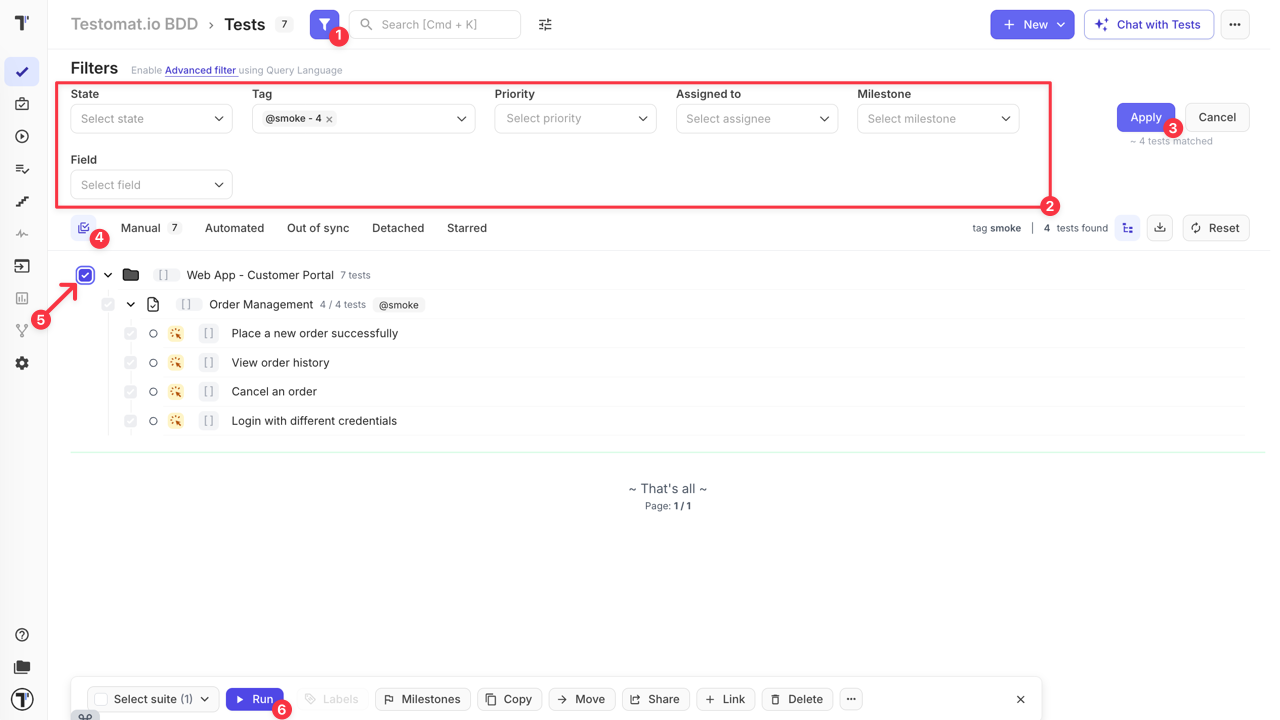
- Filter and run — use the filter panel to narrow scenarios by priority, tag, assignee, or other fields, then select the results and click Run in the bottom action bar. No test plan needed.
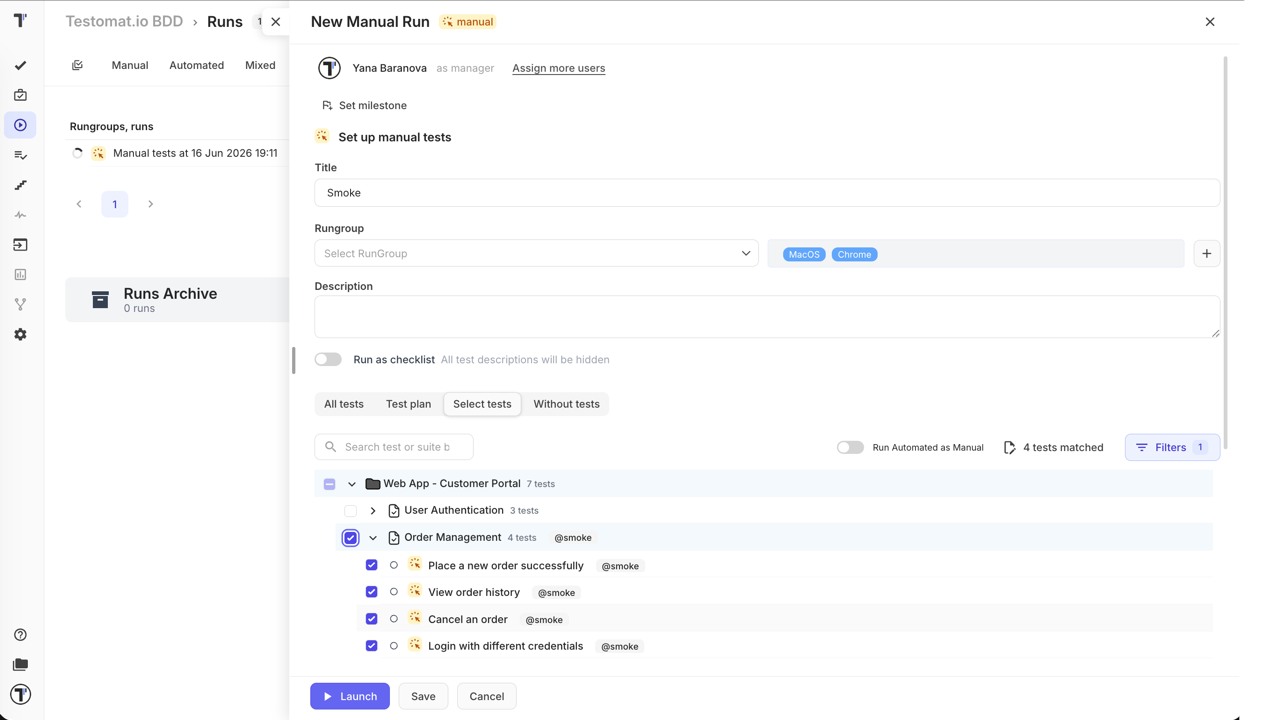
From the Runs page — use this when you need more control over the run. Click Manual Run to open the setup panel.
The key advantages over launching from the Tests page:
- Assign testers — distribute scenarios across team members; see How to Assign Users to the Run
- Rungroup and environment — organise runs and track results by environment; see How to Run Tests in Rungroups and How to Select a Test Environment
- Run as checklist — hide scenario descriptions for faster execution; see How to Run Tests as Checklist
- Test scope — choose what to include:
- All tests — all manual tests in the project
- Test plan — use a saved plan (see Plans)
- Select tests — pick scenarios manually from the tree, or use filter collections to include/exclude tests by priority, tags, assignees, milestones, labels, and more; see How to Configure a Manual Run
- Without tests — create the run structure and populate it later
- Save without launching — store the run and come back to it later
For the full run setup reference, see Running Tests Manually.
How to Execute Tests in a Manual Run
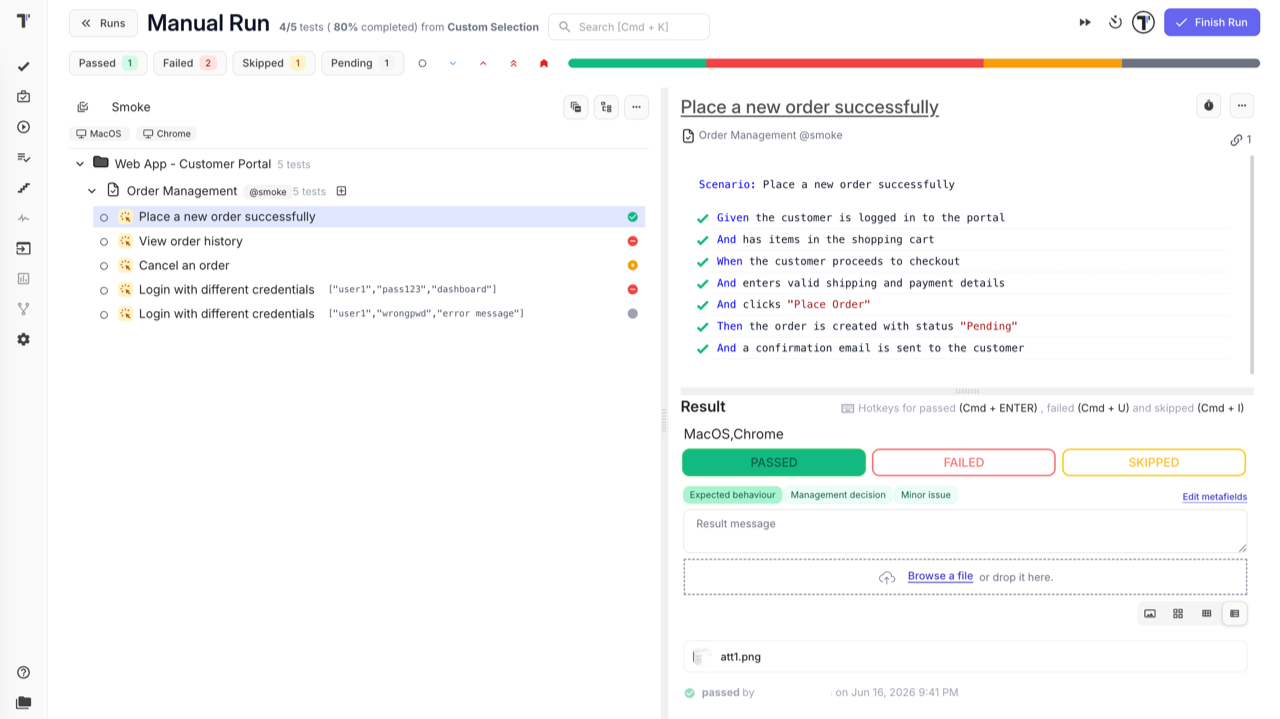
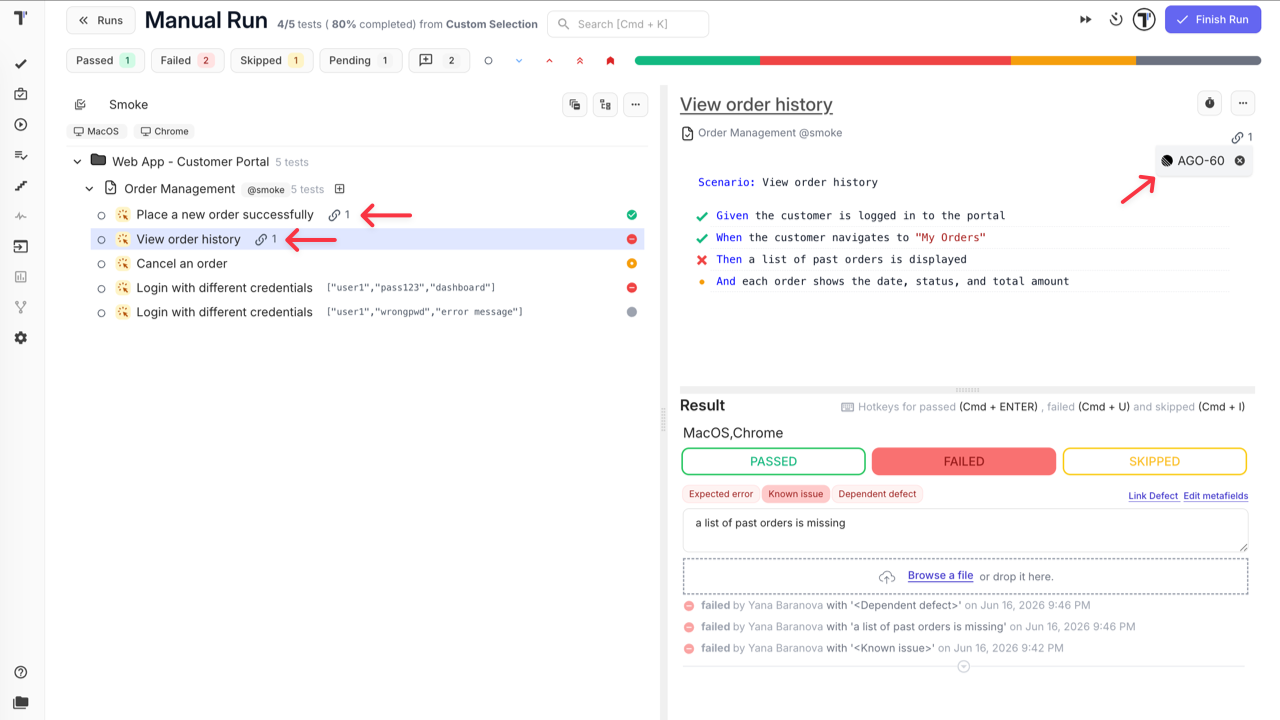
Section titled “How to Execute Tests in a Manual Run”Once the run is launched, select a scenario from the left panel and review its Gherkin steps on the right.
Mark the result:
- Passed —
Cmd+Enter(Mac) /Ctrl+Enter(Windows) - Failed —
Cmd+U(Mac) /Ctrl+U(Windows) - Skipped —
Cmd+I(Mac) /Ctrl+I(Windows)
For failed test runs, add a comment to describe the issue, attach a file as evidence, and use:
- Link Defect — connect an existing bug ticket
- Edit metafields — add extra context
The progress bar at the top tracks Passed, Failed, Skipped, and Pending counts in real time. When all scenarios are done, click Finish Run.
For checklist mode, step-by-step execution, and time tracking, see Running Tests Manually.
How to Report a Bug from a Run
Section titled “How to Report a Bug from a Run”The most common practice is to report a bug right when a test run fails — without leaving the run. When you mark a test run as Failed, the Link Defect action appears. Use it to:
- Link an existing issue — connect the test run to a bug ticket already in your tracker
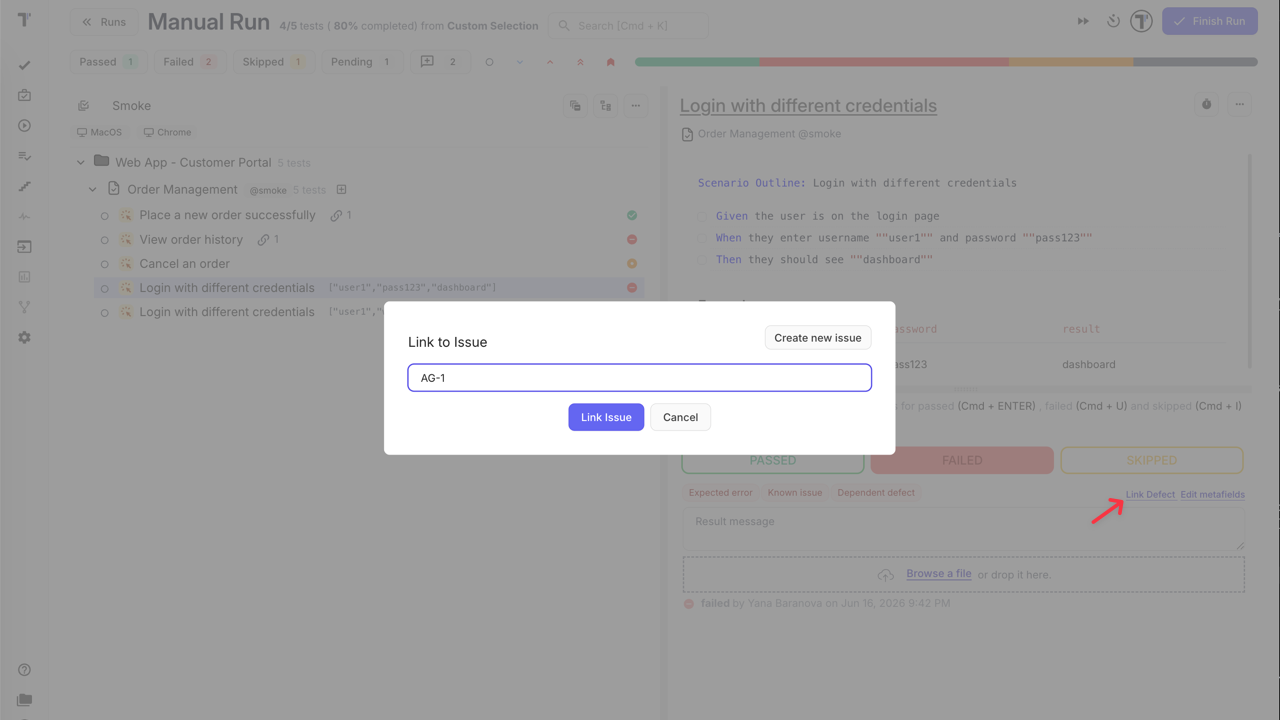
- Create a new issue — the issue modal opens with the title and description pre-filled from the scenario content (steps, expected results); select the integration, adjust details if needed, and click Create Issue. The content is pulled from the test template — see Templates
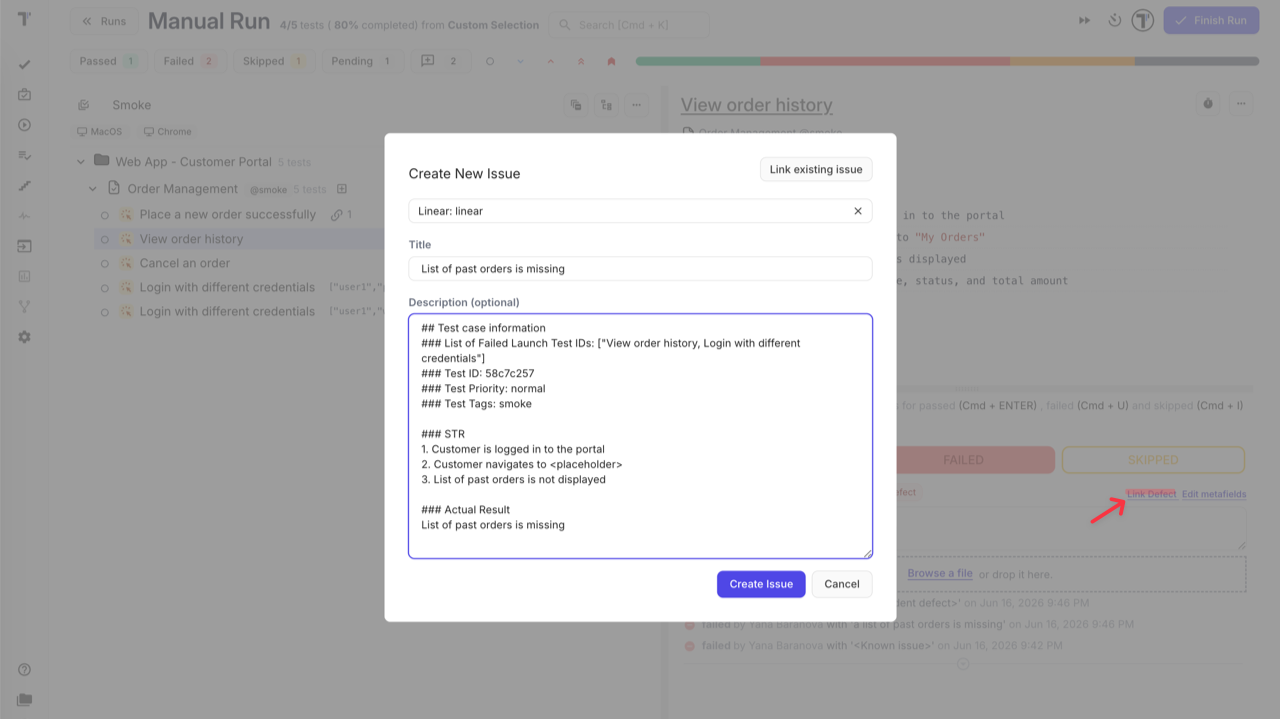
The linked ticket is attached to the test run and visible in the run and the run report.
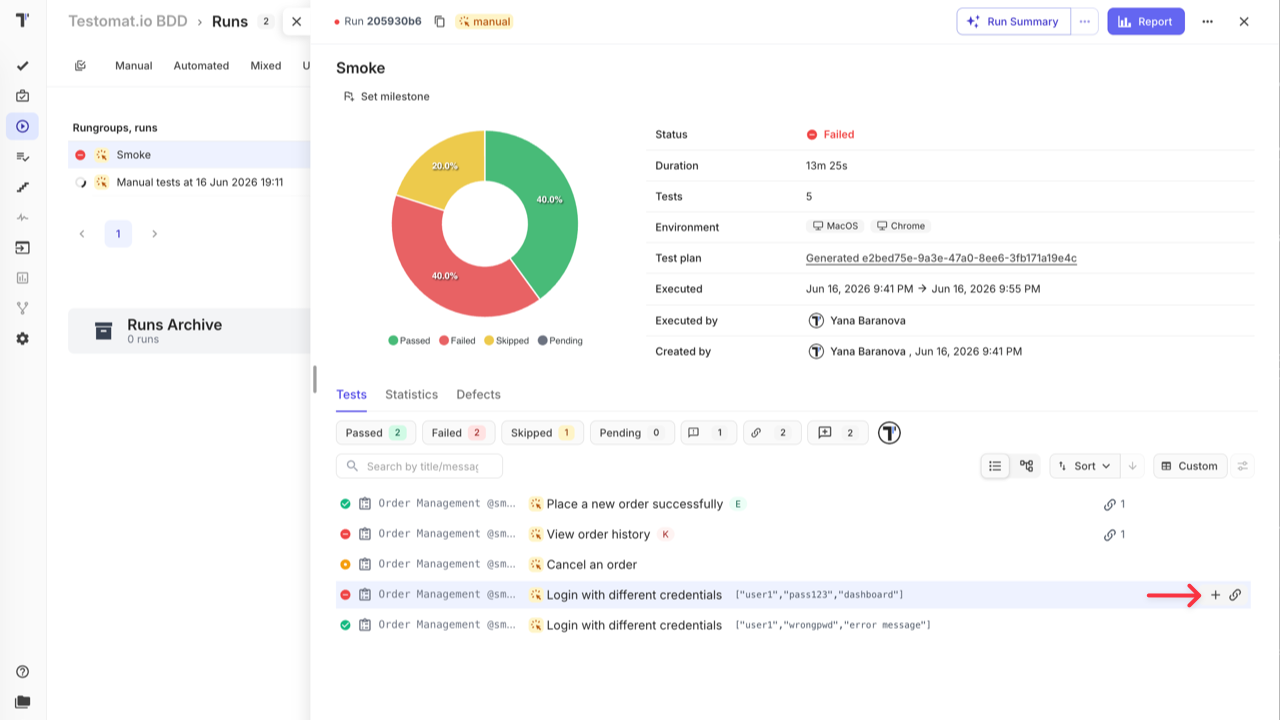
You can also link or create an issue after the run is finished — in the run report, hover over a failed test run to reveal the + and link icons, and use the same options.
How to Export and Share the Run Report
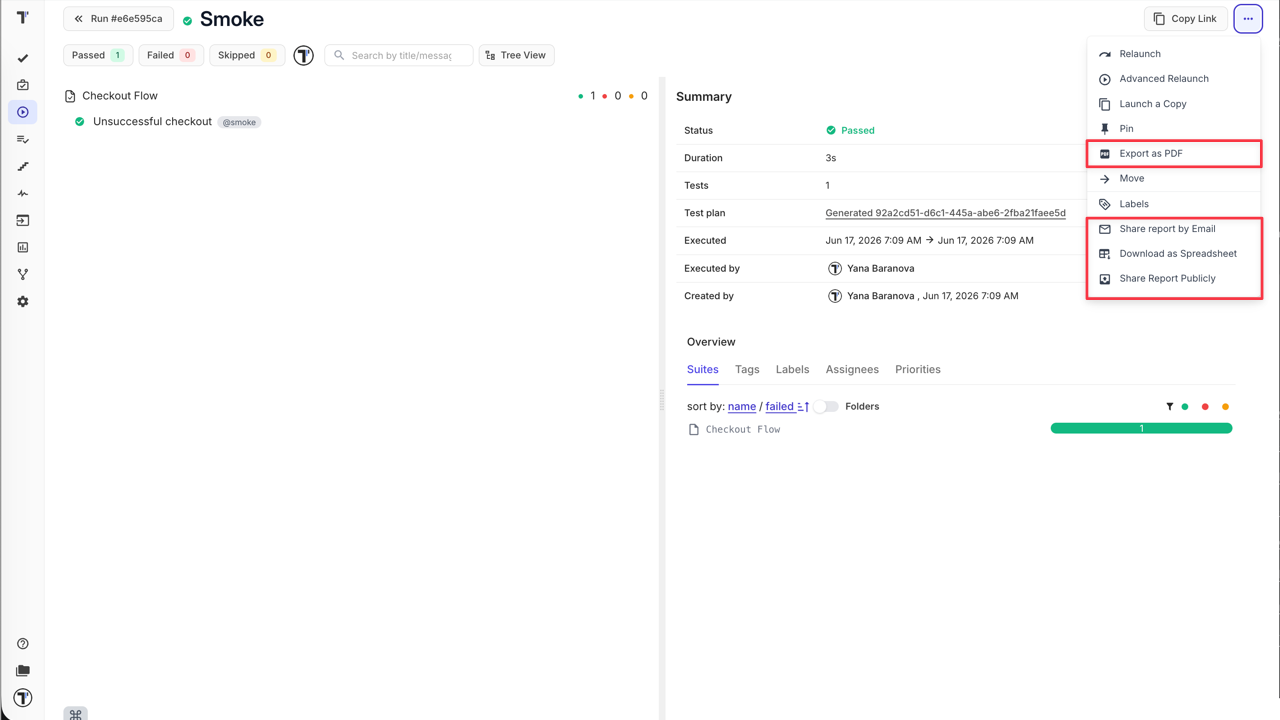
Section titled “How to Export and Share the Run Report”After completing a run, open the run report and click the Report button in the top-right corner. From there you can:
- Export as PDF — download a formatted summary for archiving or sprint reviews.
- Share report by Email — enter one or more email addresses; recipients get a link to the extended report view.
- Download as Spreadsheet — export results as XLSX for further analysis.
- Share Report Publicly — generate a public URL with an optional passcode and expiration date for stakeholders who do not have a Testomat.io account.
For full details on public sharing settings, see Run Reports.
Go Further
Section titled “Go Further”These features fit into the BDD approach at any stage — use the ones that work for your team:
- Templates — define a default content structure so every new scenario starts with the right format; see Templates
- Tags & Labels — organise scenarios with tags and custom fields for flexible filtering and reporting; see Tags & Labels
- Steps & Snippets — build a shared steps database to keep Gherkin wording consistent across features; see Steps & Snippets
- Test plans — save a reusable test scope and launch consistent runs without reselecting scenarios every time; see Plans
- Environments — tag each run with the environment it targets to keep results comparable; see Environments
- TQL — build precise queries to select scenarios by any combination of tags, priority, assignee, status, and more; see TQL
- Notifications — set up alerts for run results via Slack, email, or other channels; see Notifications
- Analytics — track test coverage, run history, and team progress across the project; see Analytics